I heard about OpenRMF.io recently and decided to take a look. It’s deployed with docker containers so I figured it wouldn’t be too hard to get up and running. Turns out it was a little tricker than I expected, so I thought I’d write down how I did it.
Eventually, I wanted a deployment with TLS certificates and using domain names instead of IP Addresses. To get to this point, I stepped through a staged process. This let me make sure I had everything work in each step.
- Deploy Keycloak using HTTP using IP Address
- Deploy OpenRMF.io over HTTP using IP Addresses
- Convert Keycloak and OpenRMF to use domain name
- Add an nginx proxy to Keycloak to use TLS certificates
- Update the openrmf-web container to use TLS certificates
This set up uses a Let’s Encrypt certificate rather than self-signed certificates. I have a wildcard certificate for my home lab. This process will be a little more straight forward than using self-signed since the API microservices will trust the certificates automatically. If you’re using a self-signed certificate, you’ll need to add a volume to all the service containers so they can validate the certificate.
I’m not going to go into details on generating a wildcard certificate. I use pfSense to renew my wildcard certificate every 90 days. Then I have my lab systems reach out and pull the certificate as needed. But there’s some good documentation out there on this process.
Lab Overview
For this setup, I have 4 systems, a router, DNS Server, OpenRMF/Keycloak Server and a Workstation.
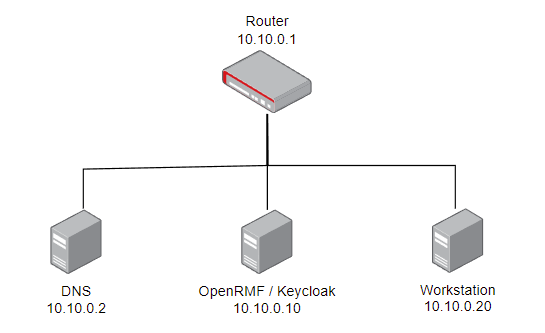
- Router – This will allow internet access while we pull down the OpenRMF.io code. It will run vyos, but this won’t matter for this lab.
- DNS Server – Obviously this will supply the DNS resolution. This system will run Ubuntu 20.04 LTS, server edition. DNS resolution will be with bind, but again, not important for this lab.
- OpenRMF / Keycloak – This will host the Keycloak and OpenRMF applications. This will run Ubuntu 20.04.
- Workstation – This is the system we’ll work from. This will also run Ubuntu 20.04.
Virtual Machine Specs
Here are the resources I assigned to each VM:
| VM Name | vCPUs | RAM | Hard Drive Size | |
| Router | 1 | 1 GB | 8 GB | |
| DNS | 1 | 2 GB | 8 GB | |
| OpenRMF | 6 | 6 GB | 50 GB | |
| Workstation | 4 | 4 GB | 32 GB |
I’m not sure 50 GB would be large enough for a production instance…but for me, this to explore the features and functionality of OpenRMF, so I’m OK with these sizes.
Prerequisites
For OpenRMF, the main dependency are docker and docker-compose. Those will need to be set up and installed on the OpenRMF system.
I also added unzip to the OpenRMF system by running sudo apt-get install unzip.
You should also have valid TLS certificates that are trusted by systems by default. This is easier than trying to set up docker containers to trust self-signed certificates.
Pull Down the OpenRMF.io Code
You can get the latest releases from github. Grab the Keycloak and OpenRMF zip files. I created a main openrmf folder in my home directory.
cd ~
mkdir openrmf
cd openrmf
wget https://github.com/Cingulara/openrmf-docs/releases/download/v1.8.1/Keycloak-v15.0.0.zip
wget https://github.com/Cingulara/openrmf-docs/releases/download/v1.8.1/OpenRMF-v1.8.1.zip
Initial Keycloak Setup
First things first, I set up the Keycloak server on the OpenRMF machine. I created a new folder keycloak and copied the keycloak zip file into this new folder. Finally unzip it.
mkdir keycloak
cp ../Keycloak-v15.0.0.zip ./
unzip Keycloak-v15.0.0.zip
There’s an included start.sh file that we can use to start up the keycloak server.

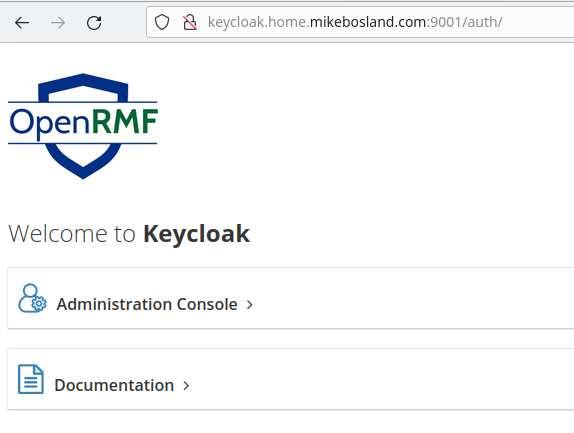
./start.shThis will pull down the keycloak docker images, create the containers and start them. Give this a few minutes – 2 or 3 usually. Once you can access the web interface at http://{ your-ip-address}:9001 the containers are up and running.
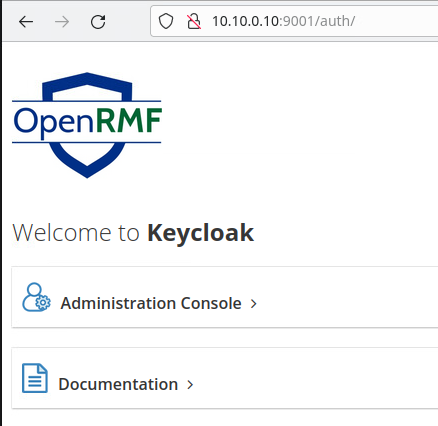
Alright! Success. Let’s configure the OpenRMF realm. There’s a script for that too. I’m running on linux, so I’m going to run the setup-realm-linux.sh. This script needs privileged access, so we use sudo. This will ask you for the IP address of your Keycloak server. I used the localhost 127.0.0.1 IP. It will also ask you for an admin account name for the OpenRMF tool. You cannot use admin, so I went with sysadmin.
sudo ./setup-realm-linux.sh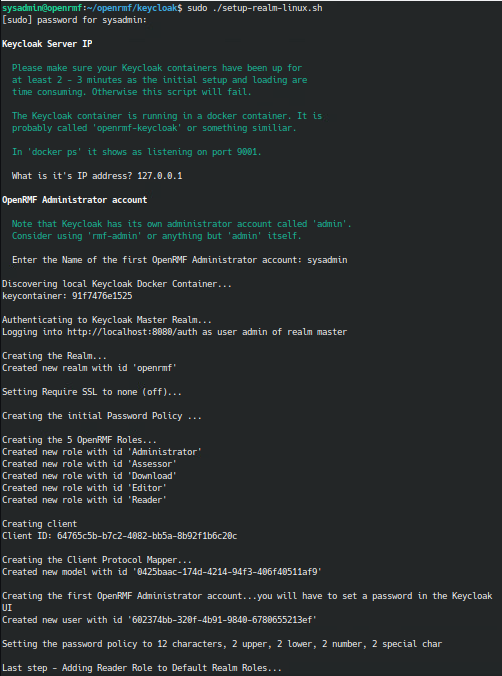
Lastly, I allowed port 9001/tcp through the firewall with ufw.
ufw allow 9001/tcpConfigure Keycloak
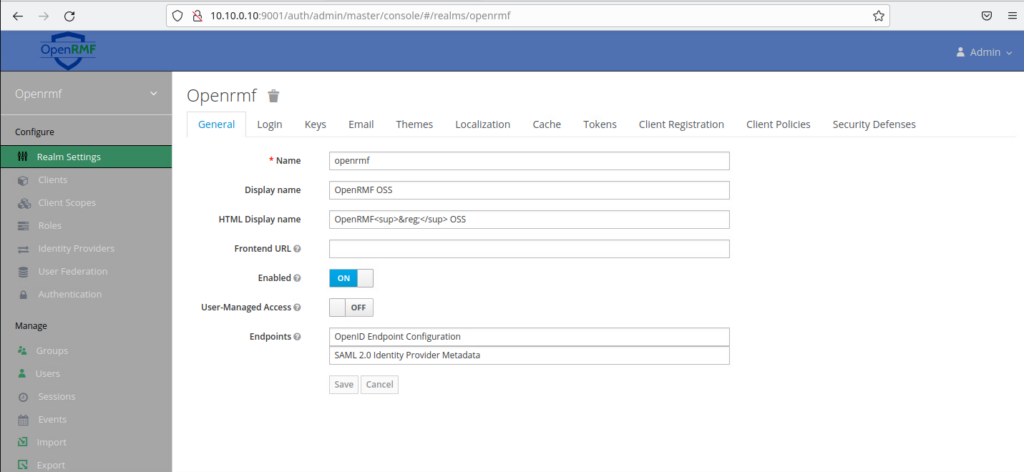
Login to the Keycloak interface by clicking Administrative Console. Login with the default credentials of user admin and password admin.
NOTE: Don’t worry about the default credentials right now. We’ll change them later once we have HTTPS set up so our new secure password isn’t sent over the wire in cleartext.
An OpenRMF user was created using the script above, but no password was created, so we’ll set one using the web interface. Navigate to Manage > Users on the left. Click View all users

Select the ID next to your admin user. Click the Credentials tab.
Enter a new password. I also turn off the Temporary switch so we don’t have to change the password when we first log in. Click Set Password and then confirm it in the popup. We’ll change this later too since this password will be sent over the wire in cleartext right now.
That should do it for Keycloak for now. Let’s move on to getting OpenRMF up initially.
Initial Setup for OpenRMF
Similar to keycloak, we’re going to create a folder for OpenRMF.
cd ~/openrmf
mkdir openrmf
cd openrmf
cp ../OpenRMF-v1.8.1.zip ./
unzip OpenRMF-v1.8.1.zip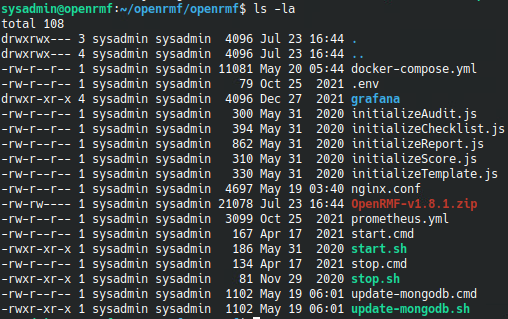
The main configuration here is to update the .env file.

The JWTAUTHORITY has to match a setting in Keycloak and the URL used to access the web app. So for me, I’m going to edit this to be
JWTAUTHORITY=http://10.10.0.10:9001/auth/realms/openrmf
JWTCLIENT=openrmf
Next, let’s set up the redirect_uri in Keycloak. In the web interface, let’s go to Clients on the left. Select Edit from the openrmf row, highlighted in red in the screenshot below.
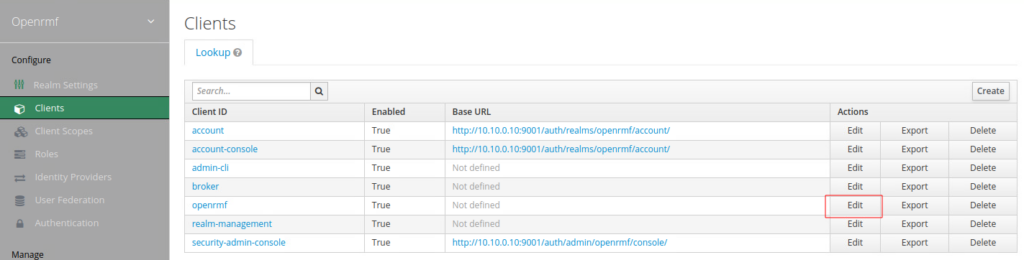
Update the Valid Redirect URIs to be the IP address of your OpenRMF interface, make sure you have the wildcard * at the end.

Click Save at the bottom of this page.
Starting OpenRMF
Let’s open the port for OpenRMF through the firewall.
sudo ufw allow 8080/tcpNow similarly, there is a start.sh script. I’m going to run that to start.
./start.shOnce the docker images are downloaded and the containers started, you can access the web app at http://10.10.0.10:8080/
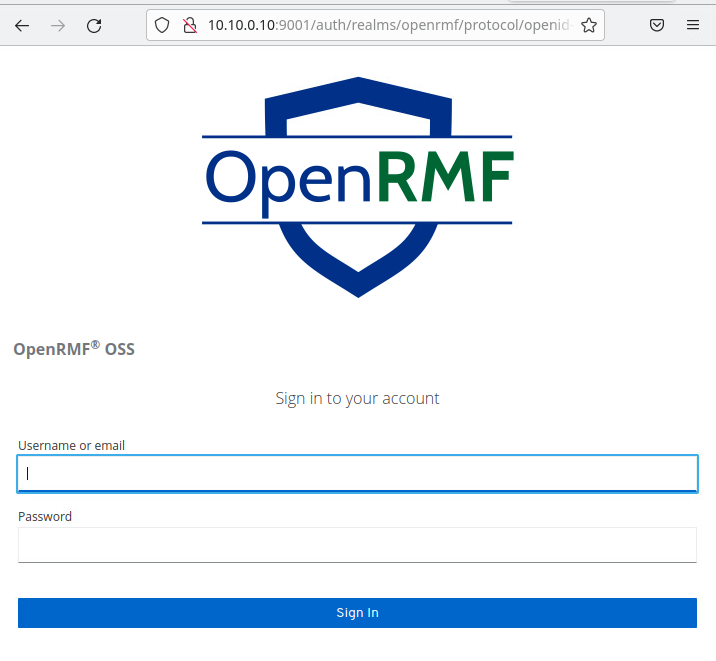
If everything is configured right, this should redirect you to sign in on the Keycloak URL. Sign in with the OpenRMF user we created: sysadmin in my case.
Here, I got an error. This error usually means the API microservices aren’t able to validate the JWT tokens – the URLs in the Valid Redirect URIs, the .env file and the URL used to access the web app.
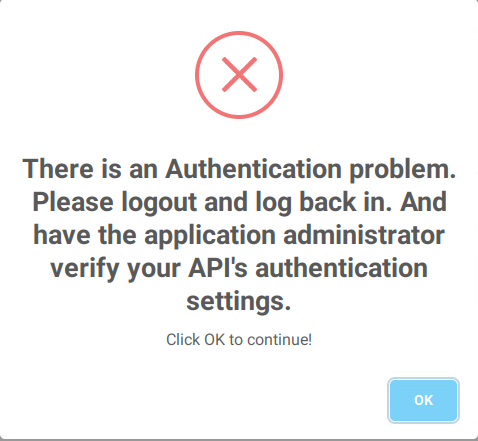
I was able to solve this error by stopping the openrmf and keycloak containers and forcing a recreate. Maybe the .env did populate to the API containers properly? Not sure what happened here.
cd /home/sysadmin/openrmf/keycloak
./stop.sh
docker-compose up -d --force-recreate
cd /home/sysadmin/openrmf/openrmf
./stop.sh
docker-compose up -d --force-recreate
Once the containers are up, go back to the OpenRMF web interface and we can see the APIs are working. We have counts in for the System Packages, Checklists and Templates.
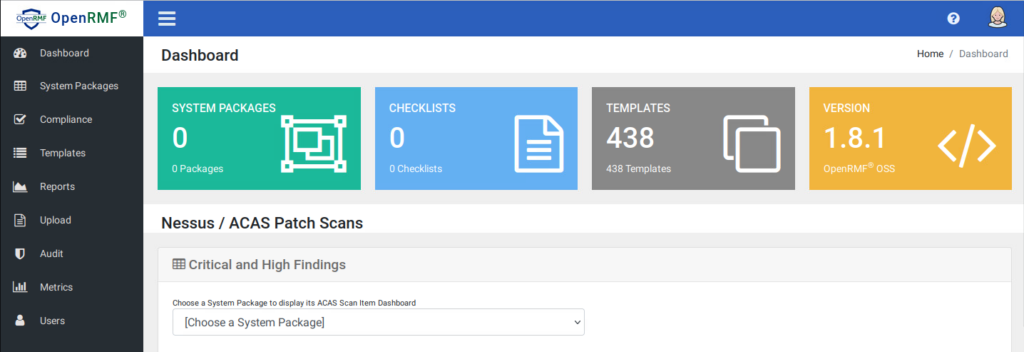
So success! We have the base system working.
Configuring OpenRMF to use Domain Names
This is great…but having to remember IP addresses isn’t exciting. So let’s configure some FQDNs. At the end of this section, we’ll have the OpenRMF system using domain names and nice URLs, but still over HTTP. That will be fixed in the next section.
Prerequisites – DNS Server
My DNS server in this lab is an Ubuntu system running bind9, but in reality it doesn’t really matter as long as you can configure (and resolve) your custome domain names.
There are 2 main FQDNs I set up. My lab domain is home.mikebosland.com so this these are what I setup.
keycloak.home.mikebosland.com
openrmf.home.mikebosland.com
Both of these are pointing to 10.10.0.10 which is my Keycloak/OpenRMF server.
Keycloak Configuration
Navigate to your keycloak domain, which for me is http://keycloak.home.mikebosland.com:9001
Log in to the Administrative Console with the default admin:admin credentials. We need to adjust the Valid Redirect URIs to include the domain names. I decided to leave the IP URI in there just in case I want to use IP for some reason.
Navigate to Clients and select Edit in the openrmf row.
I added http://openrmf.home.mikebosland.com:8080/* to the list of URIs. Press Save at the bottom of the page.

Now, since it helped last time, I’m going to stop and rebuild the containers.
cd /home/sysadmin/openrmf/keycloak
./stop.sh
docker-compose up -d --force-recreate
OpenRMF Configuration
Now that we updated Keycloak, we need to update the .env file with the new URL. It’s probably a good idea to stop the OpenRMF containers first.
cd /home/sysadmin/openrmf/openrmf
./stop.sh
Update .env file’s JWTAuthority item with the URL for the OpenRMF server, but use the keycloak port, 9001. This was the biggest “gotcha” for me.

Now we can rebuild the containers and start them.
docker-compose up -d --force-recreateOnce those are running, navigate to http://your-openrmf-domain:8080/, so for me that’s http://openrmf.home.mikebosland.com:8080/ and sign in with your openrmf admin account, for me that’s sysadmin.
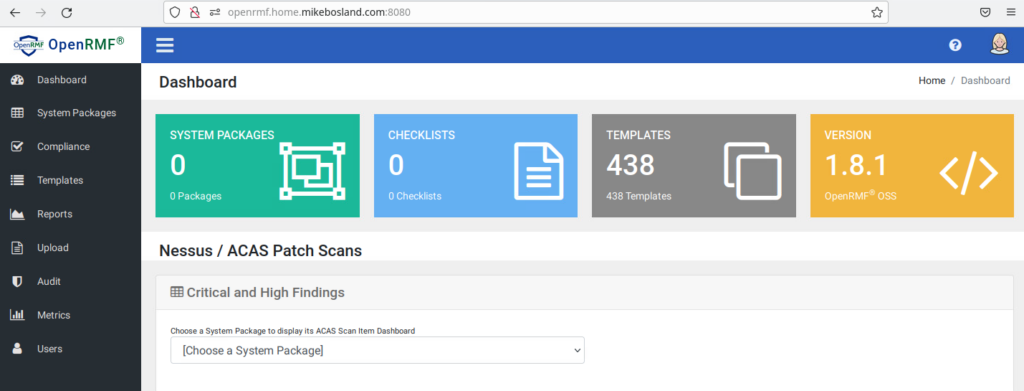
Success! We can now access OpenRMF with domain names!
Configuring OpenRMF for TLS
Alright. Almost done. For my set up, I’m using valid TLS certificates to make the process a bit easier.
Prerequisites – TLS Certificates
You’re going to need a valid TLS Certificate and a Key. As mentioned before, I’m using pfsense to automatically renew mine so we won’t go into details there.
Configuring Keycloak for TLS
I was having a hard time getting this running. Based on the OpenRMF Docs, I decided to also build an nginx proxy to sit in front of keycloak.
To do this we’ll need the following:
- Valid TLS Certificate
- Valid TLS Key
- certs.conf file
- ssl-param.conf file
- nginx.conf file
- Update docker-compose.yml
I created an nginx folder inside /home/<username>/openrmf/keycloak to hold all of these.
First up, put the TLS Certificate and Key in this nginx folder.
certs.conf
Next up, we’ll build the certs.conf file to specify the TLS certificates that nginx should use.
ssl_certificate /etc/nginx/certs/ssl/certs/home_mikebosland_com_wildcard.fullchain;
ssl_certificate_key /etc/nginx/certs/ssl/private/home_mikebosland_com_wildcard.key;
ssl-params.conf
This file specifies the SSL configuration for nginx. T
ssl_protocols TLSv1.2 TLSv1.3;
ssl_prefer_server_ciphers on;
ssl_ciphers "EECDH+AESGCM:EDH+AESGCM:AES256+EECDH:AES256+EDH";
ssl_ecdh_curve secp384r1;
ssl_session_cache shared:SSL:10m;
ssl_session_tickets off;
ssl_stapling on;
ssl_stapling_verify on;
resolver 8.8.8.8 8.8.4.4 valid=300s;
resolver_timeout 5s;
add_header Strict-Transport-Security "max-age=63072000; includeSubdomains";
add_header X-Frame-Options DENY;
add_header X-Content-Type-Options nosniff;
nginx.conf
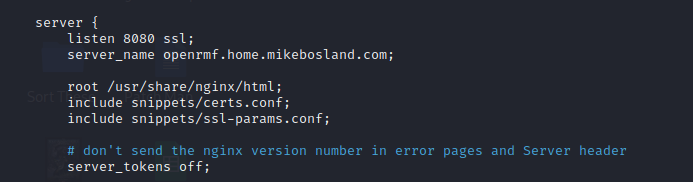
We need to set up the nginx.conf configuration file for the enginx proxy. Be sure to update the server_name in the file below. I used server_name keycloak.home.mikebosland.com;
worker_processes 4;

pid /tmp/nginx.pid; # Changed from /var/run/nginx.pid

events { worker_connections 4096; }

http {

    sendfile on;
    client_max_body_size 60M;
    include /etc/nginx/mime.types;
    keepalive_timeout  65;
    proxy_http_version 1.1;


    # configure nginx server to redirect to HTTPS
    # server {
    #     listen       9001;
    #     server_name  xxx.xxx.xxx.xxx;
    #     return 302 https://$server_name:9001;
    # }

    server {
        listen 8443 ssl http2;
        server_name  keycloak.your.domain;
        include snippets/certs.conf;
        include snippets/ssl-params.conf;

        # # don't send the nginx version number in error pages and Server header
        server_tokens off;

        proxy_set_header        Host $host:9001;
        proxy_set_header        X-Real-IP $remote_addr;
        proxy_set_header        X-Real-IP $remote_addr;
        # proxy_set_header        X-Forwarded-For $host;
        proxy_set_header        X-Forwarded-For $proxy_add_x_forwarded_for;
        proxy_set_header        X-Forwarded-Proto $scheme;

        location / {
            proxy_pass http://keycloak:8080;
            add_header X-Frame-Options "ALLOWALL";
        }
    }
}
Update docker-compose.yml
That should be all of the files we need.

Now e can update the docker-compose.yml file for keycloak. Also, under keycloak, remove the ports since we want the keycloak proxy to handle it. I just commented them out.
keycloak:
    container_name: openrmf-keycloak
    image: jboss/keycloak:15.0.0
    restart: always
    #ports:
    #  - 9001:8443
    environment:
      - KEYCLOAK_USER=admin
      - KEYCLOAK_PASSWORD=admin
      - DB_VENDOR=postgres
      - DB_ADDR=postgres
      - DB_PORT=5432
      - DB_DATABASE=keycloak
      - DB_USER=keycloak
      - DB_PASSWORD=password
      - PROXY_ADDRESS_FORWARDING=true
    depends_on:
      - postgres
    volumes:
      - ./themes/openrmf/:/opt/jboss/keycloak/themes/openrmf/:ro
      - ./standalone-ha.xml:/opt/jboss/keycloak/standalone/configuration/standalone-ha.xml:ro
    networks:
      - keycloak-network

  keycloak-proxy:
    image: nginx
    container_name: openrmf-keycloak-proxy
    restart: always
    volumes:
      - ./nginx/home_mikebosland_com_wildcard.fullchain:/etc/nginx/certs/ssl/certs/home_mikebosland_com_wildcard.fullchain
      - ./nginx/home_mikebosland_com_wildcard.key:/etc/nginx/certs/ssl/private/home_mikebosland_com_wildcard.key
      - ./nginx/ssl-params.conf:/etc/nginx/snippets/ssl-params.conf:ro
      - ./nginx/certs.conf:/etc/nginx/snippets/certs.conf:ro
      - ./nginx/nginx.conf:/etc/nginx/nginx.conf:ro
    ports:
      - 9001:8443
    networks:
      - keycloak-network
    depends_on:
      - keycloak
Time to start up keycloak.
cd /home/sysadmin/openrmf/keycloak
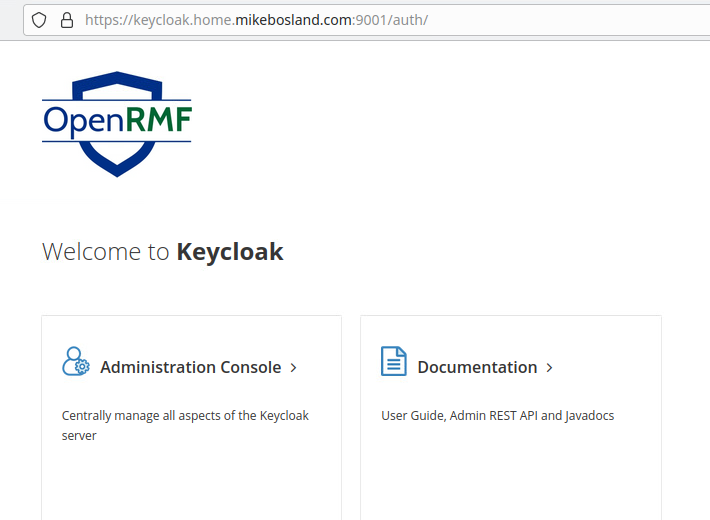
docker-compose up -d --force-createNavigate to https://keycloak.home.mikebosland.com. Success!
Log in with the default admin:admin credentials. We need to update the Valid Redirect URIs for HTTPS. Click Clients > edit on openrmf
Edit the URIs. Change http to https

Click Save.
Configure OpenRMF for HTTPs
To get HTTPs working on OpenRMF we need most of the same files. These are the items we need to address:
- Valid TLS Certificate
- Valid TLS Key
- certs.conf file
- ssl-param.conf file
- Update nginx.conf file
- Update docker-compose.yml
- Update .env
Once again, I created a folder nginx to hold these new files.
cd /home/sysadmin/openrmf/openrmf
mkdir nginx
TLS Certificate and Key
Copy the TLS Certificate and Key into this nginx folder.
Copy the certs.conf and ssl-params.conf files into this folder. Finally, add read permissions to these files. NOTE: There might be a more secure way to allow the nginx container to read these. Still need to look into that.
chmod a+r /etc/sysadmin/openrmf/openrmf/nginxUpdate nginx.conf
The changes we need to make are to the openrmf-web container. Add the certificates, certs.conf and ssl-params.conf to the volumes for this container.
version : '3.8'

services:
### 1 Web Front End Container
  openrmf-web:
    image: cingulara/openrmf-web:1.08.01
    container_name: openrmf-web
    restart: always
    ports:
      - 8080:8080
    depends_on:
      - openrmfapi-scoring
      - openrmfapi-template
      - openrmfapi-read
      - openrmfapi-controls
      - openrmfapi-audit
      - openrmfapi-report
    volumes:
      - ./nginx.conf:/etc/nginx/nginx.conf
      - ./nginx/home_mikebosland_com_wildcard.fullchain:/etc/nginx/certs/ssl/certs/home_mikebosland_com_wildcard.fullchain
      - ./nginx/home_mikebosland_com_wildcard.key:/etc/nginx/certs/ssl/private/home_mikebosland_com_wildcard.key
      - ./nginx/certs.conf:/etc/nginx/snippets/certs.conf:ro
      - ./nginx/ssl-params.conf:/etc/nginx/snippets/ssl-params.conf:ro
    networks:
      - openrmf
Update nginx.conf
We need to edit the /home/<username>/openrmf/openrmf/nginx.conf file to update the server_name and include the certs.conf and ssl-params.conf files. Make sure to add ssl to the listen line after the port number. If you miss this, you might get an SSL_ERROR_RX_RECORD_TOO_LONG.
Update .env
Lastly, let’s update the .env file to point to the new https URL.

Start up OpenRMF
Ok, I wanted to rebuild the containers, so I used
cd /home/sysadmin/openrmf/openrmf
docker-compose up -d --force-recreate
Navigate to your new https URL. For me that’s https://openrmf.home.mikebosland.com:8080
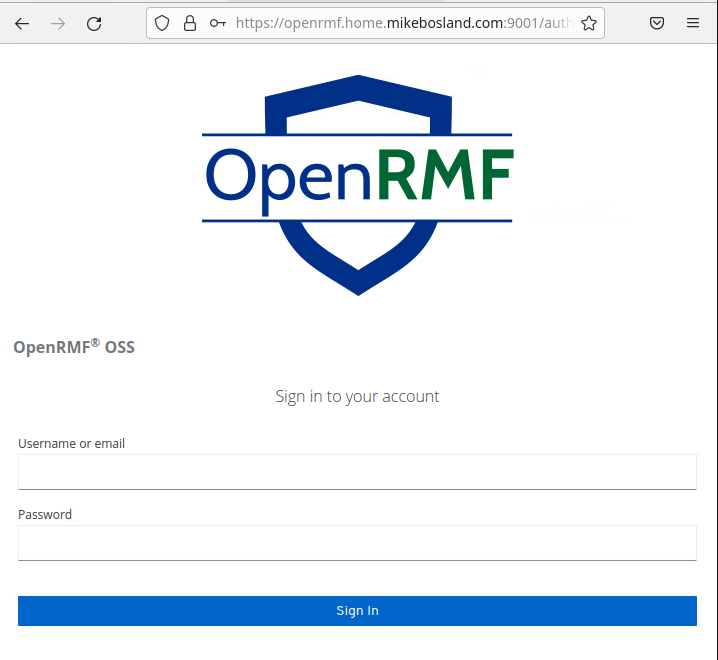
Once you log in, you should see the dashboard.

Next Steps
Now that the system is up and running, you should change the passwords now that they will be securely transferred.
After that, you can start exploring the OpenRMF tool.
Finally, thanks for making it through this mega post. If you see anything I could be doing better, feel free to let me know.
Leave a Reply