This post is part of my series on Building an Atomic Red Team Lab. This is the fifth part of this series where I’m going to document the installation process for the Active Directory Domain Controller. This will alsp be our DNS server as well.
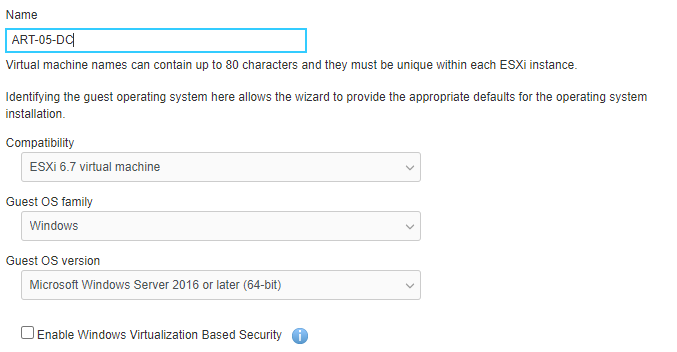
Most enterprise networks are Windows Active Directory networks, so it’s good to be familiar with how to install, configure, break and fix them. We’re going to base the domain controller on Windows Server 2019 Standard Desktop Experience. So let’s get the Operating System installed.
Installing Windows Server 2019
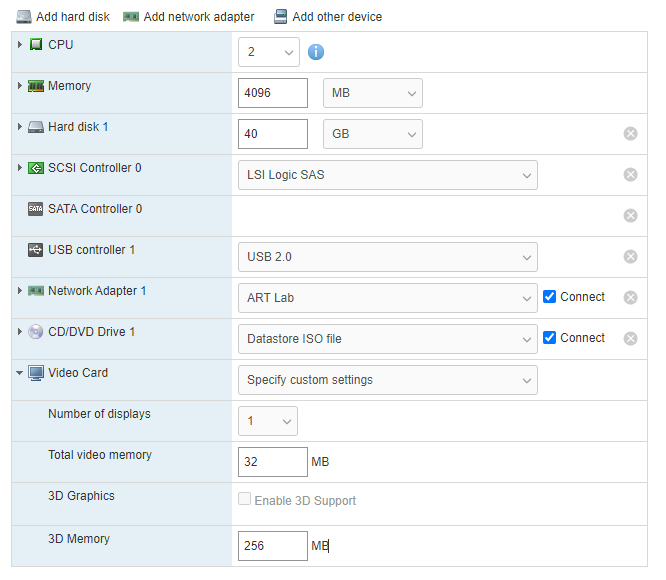
This is going to be a basic system – 2 vCPUs, 4 GB of RAM and 40 GB Hard drive. 1 NIC.
Installing the Operating System
This is the standard Windows Server installation process. Mainly clicking though and accepting the defaults. There are a few places we’ll deviate so I’ll document those here.
- Next
- Install now
- Windows Server 2019 Standard Evaluation (Desktop Experience x64)
- I accept the license terms
- Custom
- New
- Apply
- OK
- Select
Drive 0 Partition 4 - Next
- Wait…
- Set up your Administrator password
Now we log in as our new Administrator.
Installing VMWare Tools
In the ESXi host, got Actions > Guest > Install VMware Tools

In the Windows VM, open a File Explorer ad navigate to the DVD drive. Double click on setup64.exe.
- Next
- Typical
- Install
- Finish
- Yes
The computer will reboot. Log back in once its ready.
Set a Static IP
As a domain controller this machine will need a static IP address. We could do this through the GUI, but we’re hackers so let’s use the command line…or powershell in this case.
New-NetIPAddress –IPAddress 10.20.0.10 -DefaultGateway 10.20.0.1 -PrefixLength 24 -InterfaceIndex (Get-NetAdapter).InterfaceIndex

A Network window popped up asking if we want to make the PC discoverable. Click Yes.
Make sure you can ping the router
ping -n 1 10.20.0.1
Set DNS Servers
Set the router as the DNS server
Set-DNSClientServerAddress –InterfaceIndex (Get-NetAdapter).InterfaceIndex –ServerAddresses ("10.20.0.10","10.20.0.1")

Make sure you can ping Google
ping -n 1 google.com
Set a Hostname
By default, Windows systems configure a default host name that doesn’t provide any context. This will rename the computer and then restart the computer.
Rename-Computer -NewName DC1 -Restart
Install Active Directory
Let’s install Active Directory with PowerShell. First make sure we have PowerShell v5.
$PSVersionTable.PSVersion

Major  Minor  Build  Revision
-----  -----  -----  --------
5      1      17763  592
Ok good. Now let’s run these commands…
Install-WindowsFeature AD-Domain-Services
Import-Module ADDSDeployment
Install-ADDSForest -CreateDnsDelegation:$false -DatabasePath "C:\Windows\NTDS" -DomainMode "Win2012R2" -DomainName "art.lab" -DomainNetbiosName "ART" -ForestMode "Win2012R2" -InstallDns:$true -LogPath "C:\Windows\NTDS" -NoRebootOnCompletion:$false -SysvolPath "C:\Windows\SYSVOL" -Force:$true
Set up a SafeModeAdministratorPassword. This will start the installation process and then reboot the computer.
Log back in as the ART\Administrator. Now we can install the Remote Server Administration Tools Pack (RSAT) so we can have a GUI to manage users and computers.
Once again, launch powershell as an Administrator.
Install-WindowsFeature RSAT-ADDS
Disable IE Enhanced Security Mode
By default, IE Enhanced Security Mode is enabled. This is nice a secure, but I need to visit sites and pull down some files, so I’m going to disable that for Administrators since this is a lab environment.
- Server Manager > Local Server
- Click on
Onnext to IE Enhanced Security Configuration - Click
Offunder Administrators
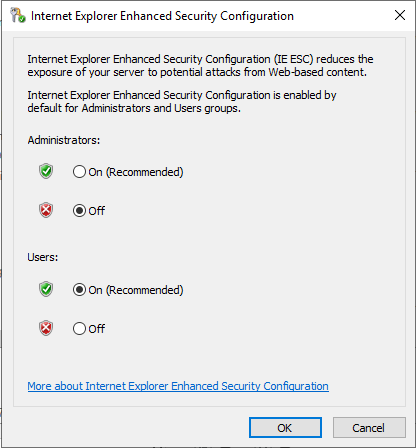
- Click
OK
Configure the DNS Service
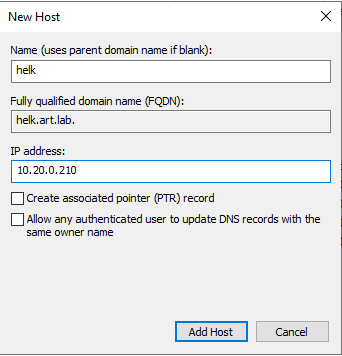
I want to be able to access the IDS and HELK instances by URL rather than just IP Address so I’m going to set that up in DNS on the Windows Domain Controller.
- Access the DNS Manage by going to Server Manager > Tools > DNS.
- Double click on the
DC1host name - Then
Forward Lookup Zones. Forward Lookup Zones store the URL -> IP Mappings - Double click on
art.lab - Right Click and choose
New Host (A or AAAA)...
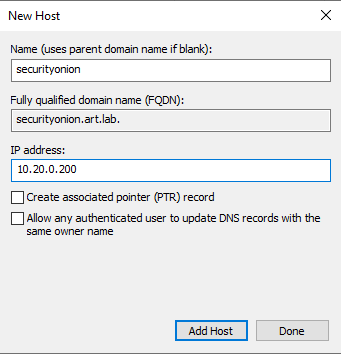
- Click
Add Host - Repeat the process for HELK.
- Click
Add Host - Repeat one more time for the router.
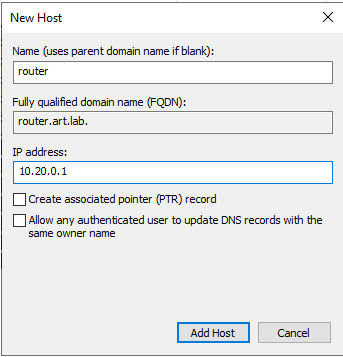
- Click
Add Host
Test the DNS Records
With the Enhanced Security off and the DNS configured, let’s see if we can access the IDS / HELK interfaces.
- Open Internet Explorer
- You’ll see a caution page. That’s due to the disabled IE Enhanced Security Mode.
- Navigate to
https://helk.art.lab - You’ll see a This site is not secure warning. This is due to the HELK instance running a self-signed certificate. Click
More informationand thenGo on to the webpage (not recommended) - When prompted, enter the username:password displayed when HELK was installed. For me it’s
helk:hunting. - The kibana dashboard will load
- I’ll add a bookmark
- Now, navigate to
https://securityonion.art.lab - I got the same warning message. Continued to the webpage.
- Now I get a mess of a web page.

- I installed Google Chrome and tried again. Now it works.
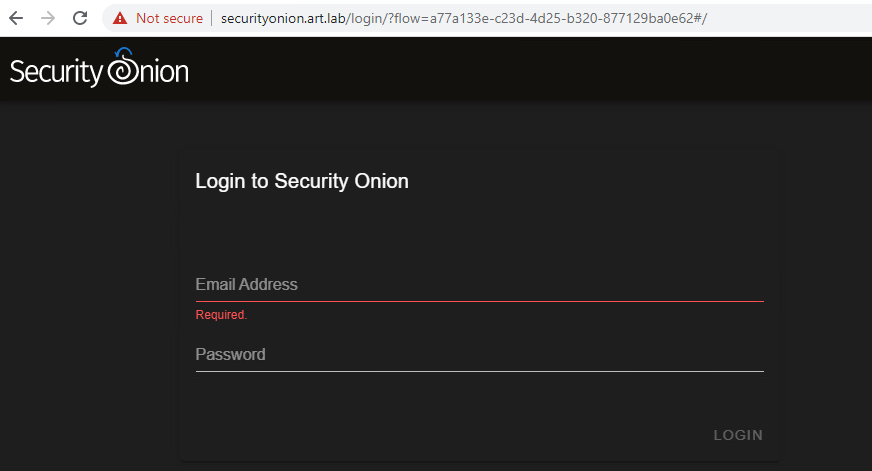
- I added SecurityOnion as a bookmark
- Sign in with the email you created during SecurityOnion set up.
- Select
Alertsfrom the left menu - You can see some alerts already identified. So it’s working!
- Click on the bell icon for each of these to acknowledge and dismiss them.
- I added HELK as a bookmark and closed the tab
Looks like the DNS is working.
Set Some Group Policy Objects
GPOs can be used to configure settings across all systems that are joined to the Active Directory domain. These will be helpful in our lab environment.
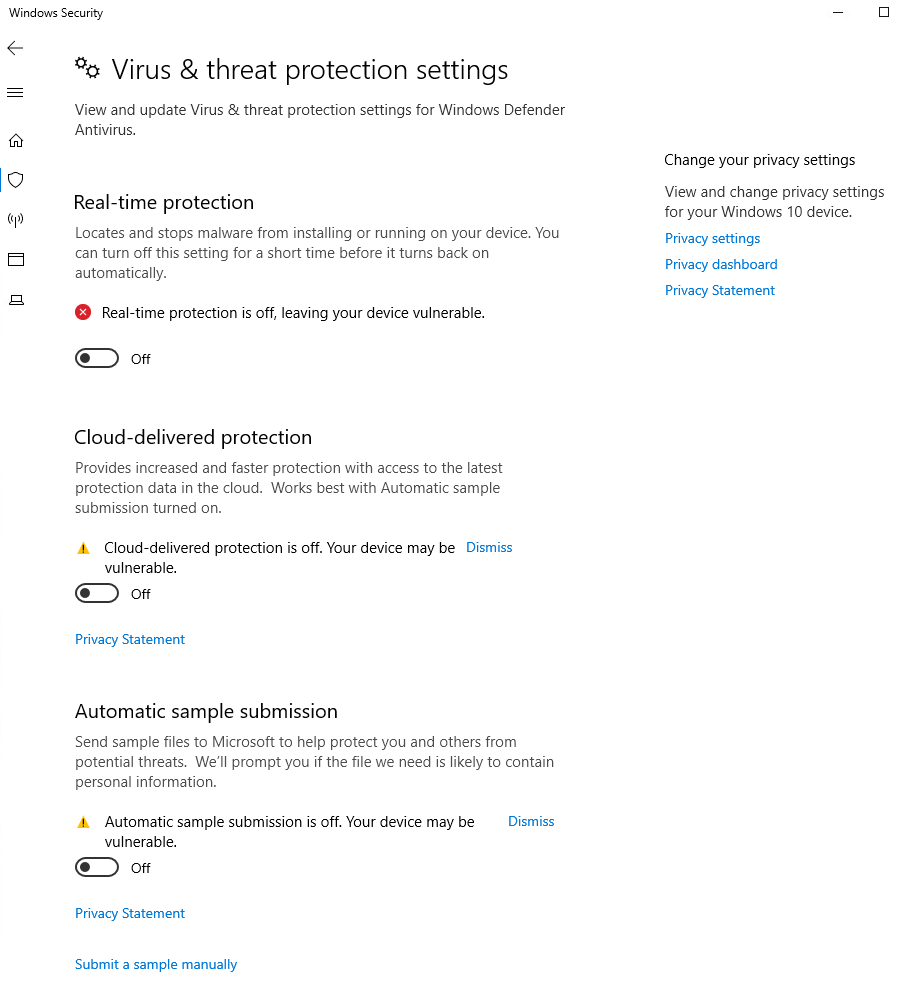
- Disable Windows Defender
- We’re going to be running malicious code intentionally, we don’t need Defender stopping us. We’re assuming the "bad guys" have successfully bypassed Defender somehow. We want to see how we can detect malicious activity with system and network logs.
- Copy and install SysMon
- SysMon is a great logging utility from Microsoft. We’ll gather logs with that and pass those to HELK.
- Copy and install WinLogBeat
- WinLogBeat will be used to ship event logs from the Windows system to the HELK server
Disable Windows Defender
- Launch the Group Policy Management Console from Server > Tools > Group Policy Management
- Right click on the domain
art.lab - Select
Create a GPO in this domain and link it here - Name this
Disable Windows Defender - Press
OK - Navigate to the domain and right click on the
Disable Windows Defenderpolicy - Select
Edit - Navigate to Computer Configuration > Policies > Administrative Templates > Windows Components > Windows Defender AntiVirus
- Double click on
Turn off Windows Defender Antivirus - Set to
Enabled - Press
ApplyandOK - Navigate to Computer Configuration > Policies > Administrative Templates > Windows Components > Windows Defender AntiVirus > MAPS
- Double click on
Join Microsoft MAPS - Set the policy to
Disabled - Press
ApplyandOK - Close the GPO Editor
Let’s check to see if it’s working. And Windows Defender is still ok.
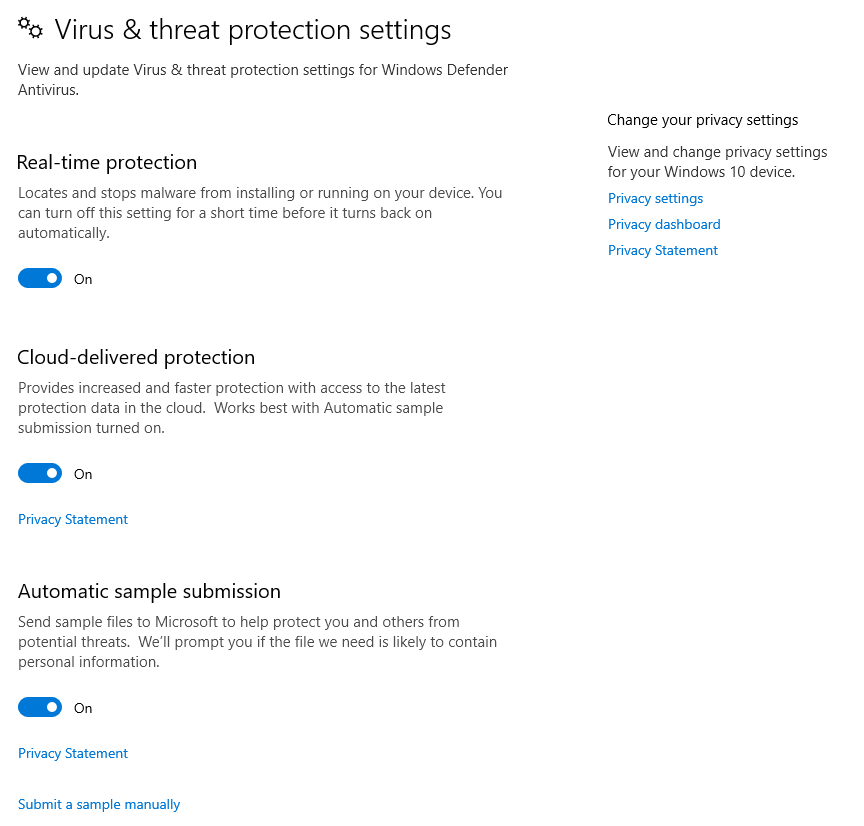
Force the Group Policies to refresh with gpupdate /Force
Perfect.
Enable Script Execution
By default, Windows requires Signed Scripts. For this lab environment, we don’t need that so we’re going to allow all scripts.
- Launch the Group Policy Management Console from Server > Tools > Group Policy Management
- Right click on the domain
art.lab - Select
Create a GPO in this domain and link it here - Name is
Enable Script Execution - Right click on the new policy and choose
Edit - Navigate to
Computer Configuration > Policies > Administrative Templates > Windows Components > Windows Powershell - Change the radio button to
Enabledand the Execution Policy Drop down toAllow all scripts. - Press
ApplyandOK - Run
gpupdate /Force
Install and Configure Sysmon
SysMon is a Windows service and device driver that logs system activity to the Windows event log. It is developed by Microsoft as part of the SysInternals Suite. These logs can then be forwarded to HELK using WinLogBeat.
Sysmon Modular
sysmon-modular is a project to help manage the complexity of sysmon rules. Since sysmon is very granular, this project helps split it up into manageable chunks.
Sysmon-Modular also maps logs to the MITRE ATT&CK framework, which will be nice to map to the Atomic Red Team tests.
- Install git from
https://git-scm.com/downloads - I accepted the defaults except:
- set the default editor to Notepad
- set the terminal emulator to Use Windows’ default console window
- Run the following commands to create a folder and clone the sysmon-modular repo
mkdir C:\source
cd C:\source
git clone https://github.com/olafhartong/sysmon-modular
cd sysmon-modular
. .\Merge-SysmonXml.ps1
Merge-AllSysmonXml -Path ( Get-ChildItem '[0-9]*\*.xml') -AsString | Out-File sysmonconfig.xml
Create a Sysmon GPO
To install Sysmon to all domain computers easily, we can set up a GPO policy to grab the config file, install it, grab a copy of Sysmon and then install Sysmon.
My initial thought was to run a script at Startup, but the machine won’t be restarted frequently – especially if this was an actual production environment. So the current iteration will run the script every hour.
The basic process is:
- Create a folder on the domain to hold the
sysmonconfig.xmlandsysmonbinaries - Create a
.batfile to install sysmon - Create a scheduled task to run the
.batfile hourly to check for sysmon changes
Sysmon Install Bat file
This file will check the architecture of the device (32 bit or 64 bit), copy the sysmonconfig.xml to the configuration directory and install the proper sysmon binary and service.
This is the script I wrote to copy the configuration file and binaries to the Windows system, install and start the sysmon service.
@echo off

# Variables
SET DC=ART.lab
SET FQDN=ART.lab

SET SYSMONDIR=C:\Windows\Sysmon
SET SYSMONCONFIGDIR=C:\Sysmon
SET SYSMONCONFIGGILE=sysmonconfig.xml

# Check 32/64 bit Architecture
IF EXIST "C:\Program Files (x86)" (
    SET BINARCH=Sysmon64.exe
    SET SERVBINARCH=Sysmon64
) ELSE (
    SET BINARCH=Sysmon.exe
    SET SERVBINARCH=Sysmon
)

# Set the local file paths (to copy to)
SET SYSMONBIN=%SYSMONDIR%\%BINARCH%
SET SYSMONCONFIG=%SYSMONCONFIGDIR%\%SYSMONCONFIGFILE%

# Set the domain file paths (to copy from)
SET GLOBALSYSMONBIN=\\%DC%\sysvol\%FQDN%\Sysmon\%BINARCH%
SET GLOBALSYSMONCONFIG=\\%DC%\sysvol\%FQDN%\Sysmon\%SYSMONCONFIGFILE%

sc query "%SERVBINARCH% | Find "RUNNING"
IF "%ERRORLEVEL%" EQU "1" (
    goto StartService
)

:Install Sysmon
IF not EXIST %SYSMONDIR% (
    mkdir %SYSMONDIR%
)

IF NOT EXIST %SYSMONCONFIGDIR% (
    mkdir %SYSMONCONFIGDIR%
)

copy /v %GLOBALSYSMONBIN% %SYSMONBIN%
copy /v %GLOBALSYSMONCONFIG% %SYSMONCONFIG%

%SYSMONBIN% -i %SYSMONCONFIG% -accepteula -h md5,sha256 -n -l
sc config %SERVBINARCH% start=auto

:UpdateConfig

copy /v %GLOBALSYSMONCONFIG% %SYSMONCONFIG%
chdir %SYSMONDIR%
%SYSMONBIN% -c %SYSMONCONFIG%
EXIT /B 0

:StartService
sc start %SERVBINARCH%
IF "%ERRORLEVEL%" EQU "1060" (
    goto InstallSysmon
) ELSE (
    goto UpdateConfig
)
Create a Domain Folder for Sysmon
We need to create a folder that is accessible to all the machines on the network. This folder will house the original binaries, configuration files and the install script.
- Open File Explorer, and navigate to
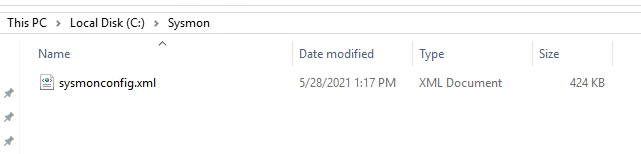
\\art.lab\SYSVOL\art.lab\Sysmon - Copy
sysmonconfig.xmlto this folder - Copy the downloaded Sysmon binaries to this folder
- There should be 3 files in that folder now
Create a GPO to Create a Scheduled Task
Now we need to create a scheduled task that will run the installation script on a regular basis. Each time the script is run, it will pull the copy of the sysmonconfig.xml file from the network. This way we can assure that all machines are running the msot recent configuration if we need to make changes.
- Create a GPO to create the scheduled task
- Name is
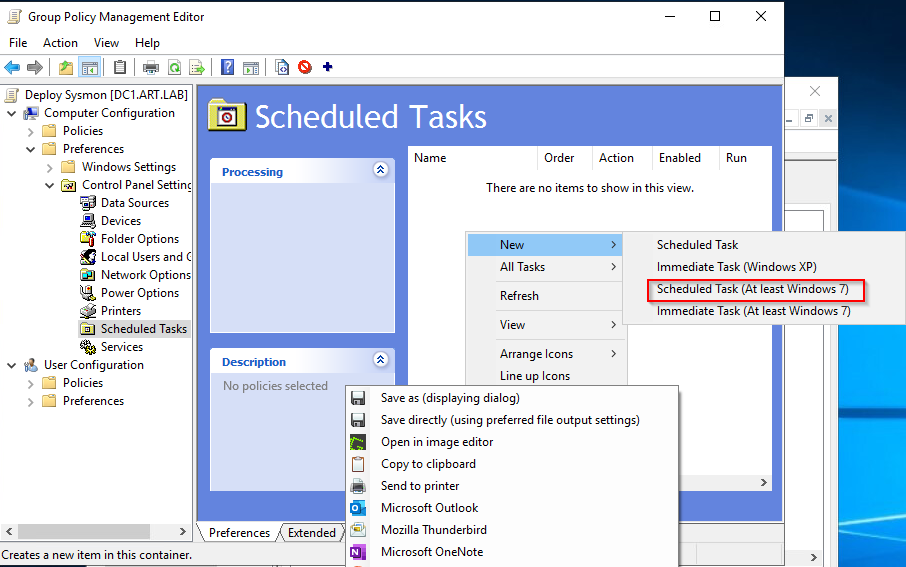
Deploy Sysmon - Computer Configuration > Control Panel Settings > Scheduled Tasks
- Right click > New > Scheduled Task (At least Windows 7)
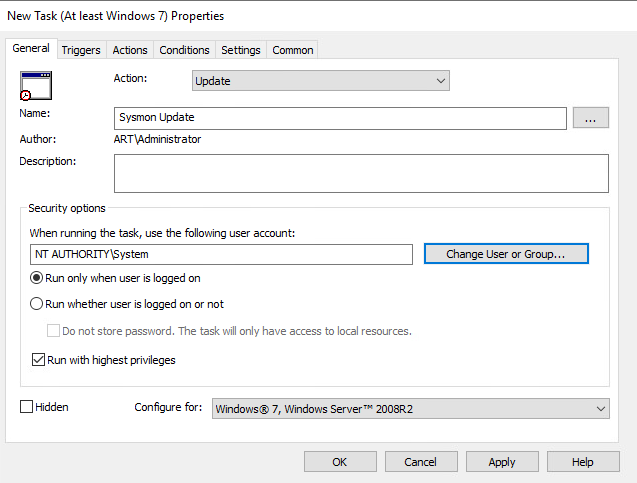
- Under General, configure it to match the screenshot below
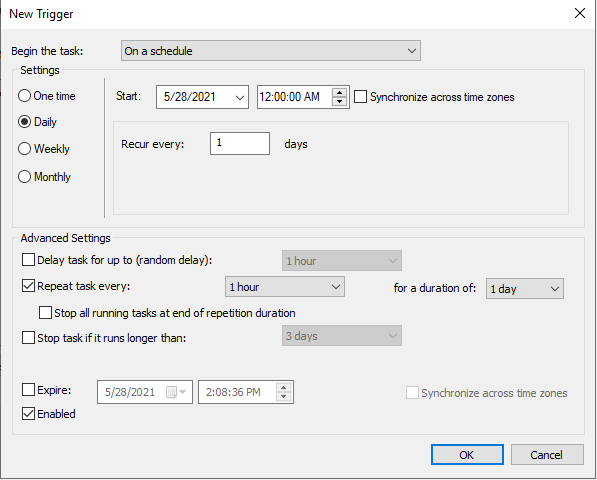
- Under Trigger, click
Newand configure to match the screenshot
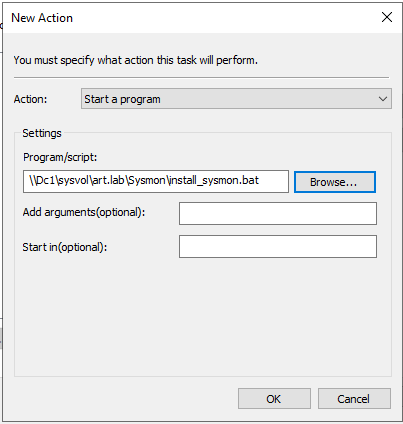
- Under Actions, click
Newand configure it to match the screenshot below.
- Finally, under Settings, check
Allow task to be run on demand
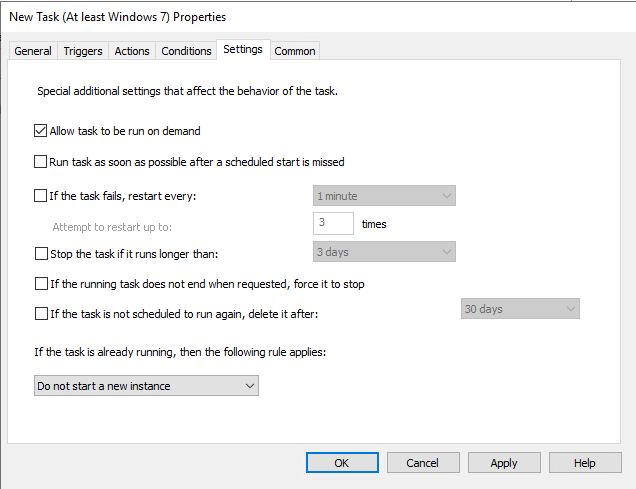
- Press
OK
Test the GPO
At the moment, we can see there is not a C:\Sysmon folder or a C:\Windows\Sysmon. So let’s force a Group Policy update with gpupdate /Force to grab the new GPO.
Type Get-ScheduledTask to see the list of tasks. Look for Sysmon Update to confirm the GPO was applied.

The task is there…but you can manually trigger it to run it…or wait for the next hour since the task is configured to run manually. I’m impatient so I’m going to trigger it manually.
Start-ScheduledTask -TaskName "Sysmon Update"
Now we can see the C:\Sysmon folder.
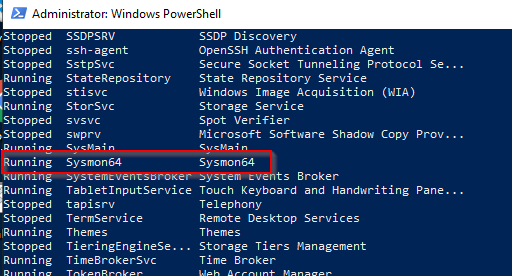
If you run Get-Service you can see all the services. You should see Sysmon or Sysmon64 in the list.
Finally, if you open the Event Viewer, navigate to Application and Services Logs > Microsoft > Sysmon > Operational you can see the logs Sysmon is recording. Everything is working.
Now, each machine that joins the domain, will have sysmon automatically installed.
To update sysmonconfig.xml, make the modifications to the files in C:\source\sysmon-modular, run the powershell commands we did previously and copy the new sysmonconfig.xml to the domain folder \\art.lab\SYSVOL\art.lab\Sysmon. Each hour the machines will grab the file and restart sysmon.
WinLogBeat Installation and Configuration GPO
WinLogBeat is a tool created by Elastic to ship logs to Logstash or Elastic. Similar to what we did for Sysmon, we’re going to create a GPO to grab the latest WinLogBeat config, binary and then install the service. Since the config file isn’t going to change much, we can set the GPO to run on start up.
Create the Installation Script
Create a new script and name it install_winlogbeat.ps1
# This script will remove WinLogBeat, and reinstall it

#  Delete the WinLogBeat service if it already exists
if (Get-Service winlogbeat -ErrorAction SilentlyContinue) {
  $service = Get-WmiObject -Class Win32_Service -Filter "name='winlogbeat'"
  $service.StopService()
  Start-Sleep -s 1
  $service.delete()
}

$configDir = "C:\WinLogBeat"
$configFile = "$configDir\winlogbeat.yml"
$exefile = "$configDir\winlogbeat.exe"

$dc = "art.lab"
$fqdn = "art.lab"
$globalConfigFile = "\\$dc\sysvol\$fqdn\Winlogbeat\winlogbeat.yml"
$globalExeFile = "\\$dc\sysvol\$fqdn\Winlogbeat\winlogbeat.exe"

# create the folders
New-Item -ItemType Directory -Force -Path "$configDir"
New-Item -ItemType Directory -Force -Path "$configDir\data"
New-Item -ItemType Directory -Force -Path "$configDir\logs"

# Copy the files from Sysvol
Copy-Item -Path "$globalConfigFile" -Destination "$configFile"
Copy-Item -Path "$globalExeFile" -Destination "$exefile"

# Create the new service
New-Service -name winlogbeat -displayName Winlogbeat -binaryPathName "`"$exefile`" --environment=windows_service -c `"$configFile`" --path.home `"$configDir`" --path.data `"$configDir\data`" --path.logs `"$configDir\logs`" -E logging.files.redirect_strderr=true"

# Attempt to set the service to delayed start using sc config
Try {
    Start-Process -FilePath sc.exe -ArgumentList 'config winlogbeat start=delayed-auto'
}
Catch { Write-Host -f red "An error occurred setting the service to delayed start" }

# Try to start the new service
Start-Service -Name "winlogbeat"
- Create a folder at
\\art.lab\SYSVOL\art.lab\Winlogbeat - Copy the winlogbeat.yml (below) to the newly created folder
###################### Winlogbeat Configuration Example #########################
# Winlogbeat 6, 7, and 8 are currently supported!
# You can download the latest stable version of winlogbeat here:
# https://www.elastic.co/downloads/beats/winlogbeat

# For simplicity/brevity we have only enabled the options necessary for sending windows logs to HELK.
# Please visit the Elastic documentation for the complete details of each option and full reference config:
# https://www.elastic.co/guide/en/beats/winlogbeat/current/winlogbeat-reference-yml.html

#-------------------------- Windows Logs To Collect -----------------------------
winlogbeat.event_logs:
  - name: Application
    ignore_older: 30m
  - name: Security
    ignore_older: 30m
  - name: System
    ignore_older: 30m
  - name: Microsoft-windows-sysmon/operational
    ignore_older: 30m
  - name: Microsoft-windows-PowerShell/Operational
    ignore_older: 30m
    event_id: 4103, 4104
  - name: Windows PowerShell
    event_id: 400,600
    ignore_older: 30m
  - name: Microsoft-Windows-WMI-Activity/Operational
    event_id: 5857,5858,5859,5860,5861

#----------------------------- Kafka output --------------------------------
output.kafka:
  # initial brokers for reading cluster metadata
  # Place your HELK IP(s) here (keep the port).
  # If you only have one Kafka instance (default for HELK) then remove the 2nd IP that has port 9093
  hosts: ["10.20.0.210:9092"]
  topic: "winlogbeat"
  ############################# HELK Optimizing Latency ######################
  max_retries: 2
  max_message_bytes: 1000000
- Create a new GPO and link it to the domain
- Name it
Deploy Winlogbeat - Right click and press
Edit - Navigate to Computer Configuration > Policies > Windows Settings > Scripts.
- Double click on
Startup - Change to the Powershell tab
- Click
Add - Script Name should be
\\art.lab\sysvol\art.lab\Winlogbeat\install_winlogbeat.ps1 - Click
OK - Click
Apply - Click
OK
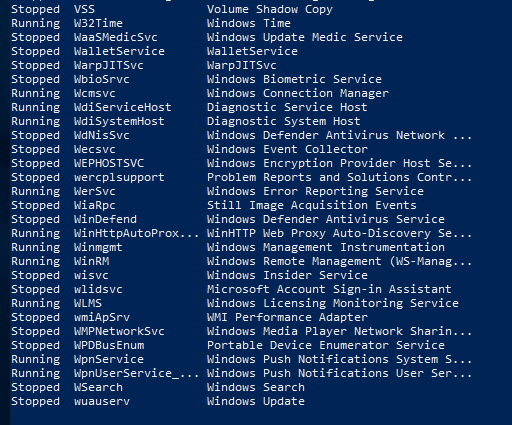
Right now, we don’t have any winlogbeat service.
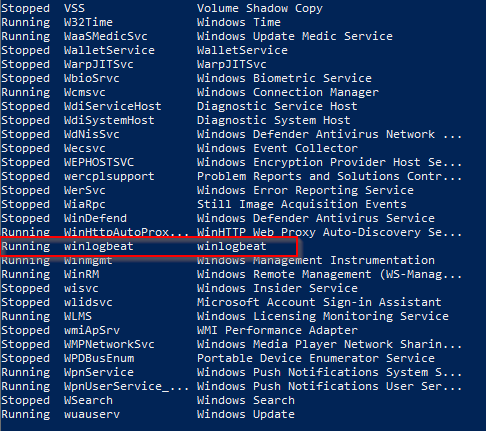
So let’s reboot the machine and see if the Startup scripts run. After we log in, we should see C:\Winlogbeat and if we run Get-Services, we should see winlogbeat in the list now.
When I checked in HELK, I didn’t see any events. But after restarting the Kafka-Broker docker container on the HELK server, they started to appear.
sudo docker container restart helk-kafka-broker
Snapshot
At this point, I’d shut down the machine and take a snap shot of the current working state. After that, make sure to restart the machine since we’ll need this up when we start on the Windows Workstation next.
Leave a Reply