This post is part of my series on Building an Atomic Red Team Lab. This is the fourth part of this series where I’m going to document the installation process for Hunting ELK (HELK). This is the first log, alerting and analysis system I’m going to look at.
HELK is a hunting platform built around the ElasticSearch, Logstash and Kibana technology stack. Logs are sent from the host system, using WinLogBeat, to the HELK server.
The logs from WinLogBeat first enter into the Kafka listener. Kafka is a distributed publish-subsscribe messaging system. From there, the lgos are parsed by Logstash and stored in an ElasticSearch database. These stored messages can be searched and displayed in dashboards using Kibana.
So now that we have a little understanding of how the system works, let’s dive in to the installation process.
Installation
Host Operating System
According to the documentation, Ubuntu 18.04.5 Server is the prefered operating system, so we’ll do with that.
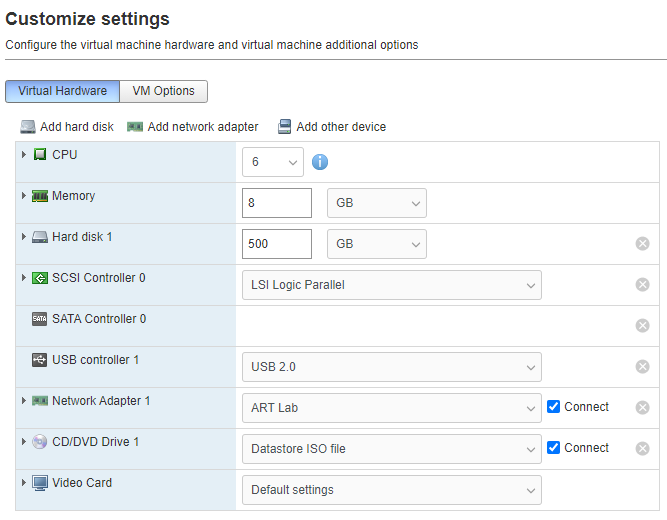
Create a virtual machine with the following settings.
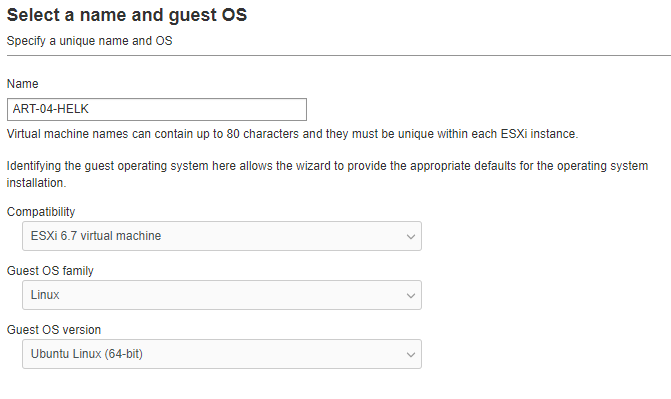
The installation process here is simple. Defaults are fine. Just next your way through.
When you get to the network section, you need to manually configure an IP address since I didn’t set up a DHCP server on the router. I added the Domain Controller IP as a DNS server and the router as a DNS server.
I set the machine name to helk and installed openssh-server as well. That way it will be easy to configure once we get everything running. Once it’s complete, select Reboot. Press Enter when prompted.
Once Ubuntu is installed, I first run some updates.
sudo apt-get update && sudo apt-get upgrade -y
Once those updates are complete, install VMWare tools.
sudo apt-get install open-vm-tools
Install HELK
Once the updates are complete, it’s time to install the HELK platform. To start, we’ll grab the code from github and then run the install script.
sudo apt-get install -y git
mkdir ~/source
cd ~/source
git clone https://github.com/Cyb3rWard0g/HELK.git
cd HELK/docker
sudo ./helk_install.sh
1
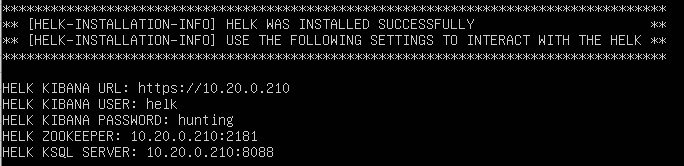
10.20.0.210
hunting
In the output you will see some URLs, usernames and passwords. Make sure you save that.
Snapshot
Once the system is ready, shut down the machine and take a snapshot. Shutting down the machine helps make the snapshot process go faster.
Leave a Reply