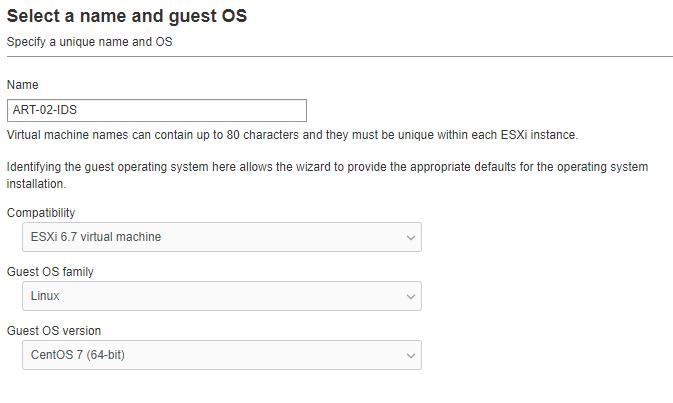
This post is part of my series on Building an Atomic Red Team Lab. This is the second part of this series where I’m going to document the installation process for the Intrusion Detection System (IDS).
Operating System
Our Intrusion Detection System (IDS) will monitor the network traffic for suspicious or malicious traffic…which I’ll be generating. I’m going to use the new version of SecurityOnion for this.
SecurityOnion is a free and opensource IDS and network monitoring platform. It has a suite of tools installed by default: A full ELK stack, Zeek, Wazuh, Suricata, Snort, etc. You can use the latest Emerging Threats ruleset to grab the most recent threat signatures known in the wild.
SecurityOnion2 is based on CentOS 7, so we’ll use that to build the base VM.
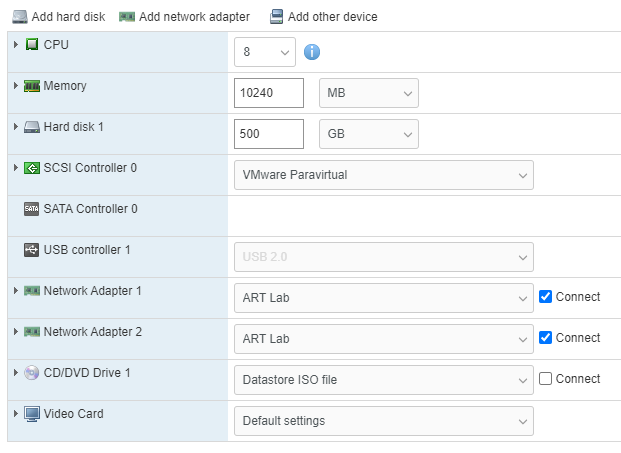
The VM is going a standalone deployment meaning that all of the elements reside on the same server. So, we’re going to need to power behind it. I’m going to start with 8 vcpus, 12GB of RAM, 500GB Hard Drive (thin provisioned) and 2 NICs – 1 for management and 1 for sniffing.
Installation
Installing SecurityOnion 2 is pretty straight forward. The installer walks you through the process.
- Press enter
- Type
yesto agree that any existing data will be over written - Enter an administrator username and password
- Wait…this takes quite a while…be patient. No really. It’s a while.
- Once that’s finally done, press
enterto reboot the machine.
Configuration
he first time you log in after installation, you will be prompted to configure the system. Here are the selections I made:
- Yes
- Install
- Standalone
- Agree
- Standard
securityonion- use anyway
IDS- ens192
- STATIC
10.20.0.200/2410.20.0.110.20.0.10,10.20.0.1art.lab- OK
- Direct
- ens224
- Automatic
10.20.0.0/24- Basic
- Zeek
- ETOPEN
- OK
- OK
- Yes
- [email protected]
- <your secure password>
- OTHER
- securityonion.art.lab
- <another secure password for soremote>
- BASIC
- 1
- 1
- Yes
- 0.pool.ntp.org,1.pool.ntp.org
- NODEBASIC
- Yes
- 10.20.0.0/24
- Yes
And now we wait…Once it finished, I received an error.
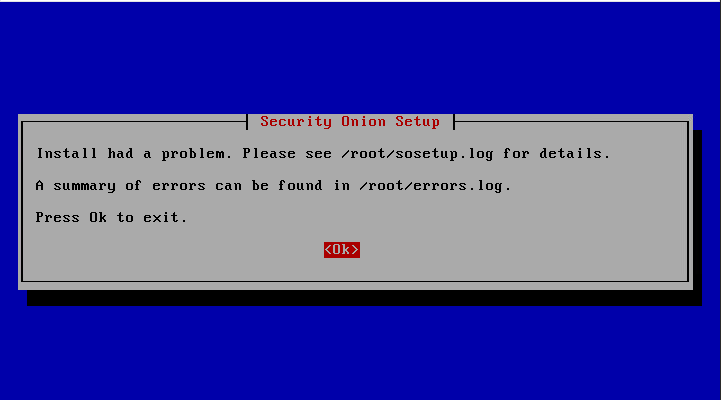
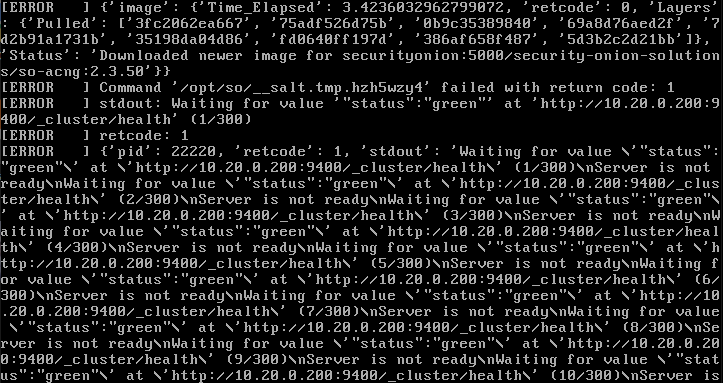
When I checked the logs, it appeared to be mainly Service not ready type errors.
Hopefully a reboot solves this. So I rebooted the machine and ran sudo so-status to check which services are running.

Alright, we’re still coming up. Wait a bit and repeat…
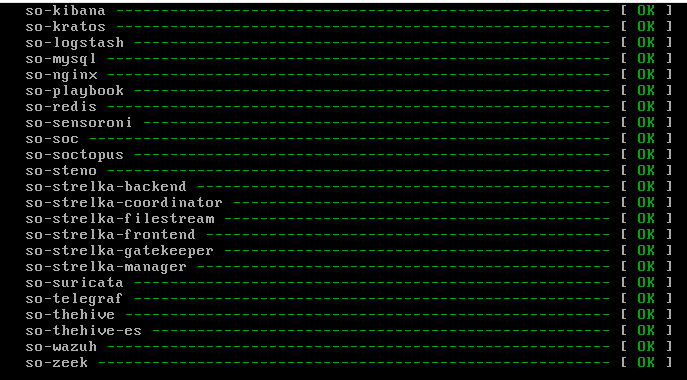
Now we can see all the services are up and running.
We need to allow access from the outside world. I’m going to allow anyone on the lab network to view this page so I can check from any machine. In reality, you’d want to lock this down much tighter.
sudo so-allow
a
10.20.0.0/24
Snapshot
It’s a good idea to take a snapshot of the virtual machine now so we have something to revert to if something breaks or we try something malicious and need to reset.
Leave a Reply